
 The Calico rimfire uses a very simple blowback action.
The bolt is held in place by the recoil spring assembly, and is forced
back by the recoil of the cartridge. This is the same type of action that
has traditionally been used in the common 22 pistol, and rifle. Though the
action is simple, very much more simple than that of the 9mm Calico, the
rimfire Calico is fairly difficult to strip down, and is quite difficult
to reassemble, unless you learn a few tricks. You will need a punch, screwdriver,
or some other sort of long thin tool to get the roll pins out of the
receiver. I have done it with my fingers, but you need strong nails, and
fairly insensitive fingertips to do this, unless you enjoy pain.
The Calico rimfire uses a very simple blowback action.
The bolt is held in place by the recoil spring assembly, and is forced
back by the recoil of the cartridge. This is the same type of action that
has traditionally been used in the common 22 pistol, and rifle. Though the
action is simple, very much more simple than that of the 9mm Calico, the
rimfire Calico is fairly difficult to strip down, and is quite difficult
to reassemble, unless you learn a few tricks. You will need a punch, screwdriver,
or some other sort of long thin tool to get the roll pins out of the
receiver. I have done it with my fingers, but you need strong nails, and
fairly insensitive fingertips to do this, unless you enjoy pain.
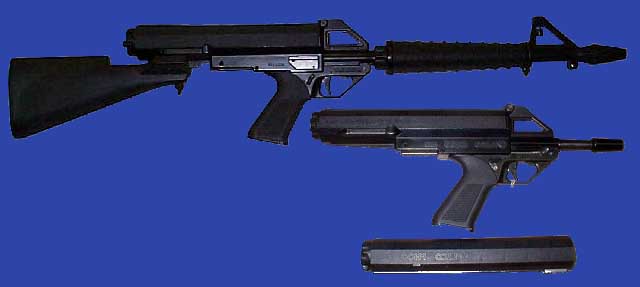
One very obvious difference is that the rimfire Calico
is a much more crudely designed weapon than the 9mm version. it also had
a few bugs in disassembly, and in the configuration of the sights, than was
the case on the latter 9mm versions. This was the original Calico, and lessons
learned in the design of the rimfire version were used to refine the design
of the latter 9mm model.
|
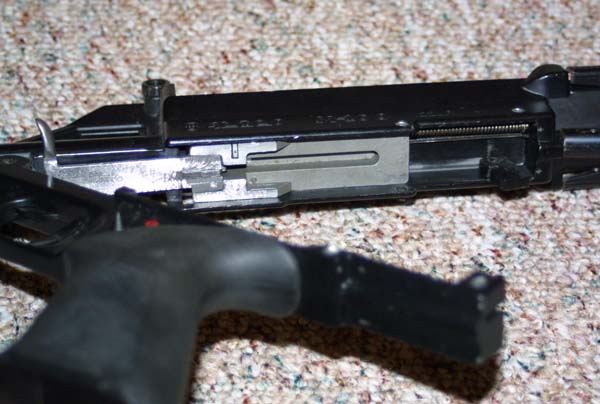
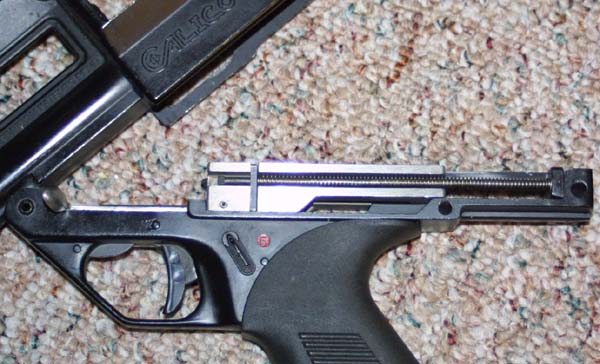
Removing the rear most two roll pins, allows the
receiver halves to be broken open, like a double barreled shotgun, or an
M-16.AR-15. |
|
Field stripping and reassembly can be done with the action open like this. Removing the third roll pin, which sits forward of the trigger guard, allows the receiver halves to be completely separated. This can make reassembly a bit easier. |
|
When you first open the gun, you may find the
internal parts in a bit of disarray, in the upper receiver. This is a result
of the way the recoil buffer, ejector, and recoil springs rest against the
lower receiver, while the bolt itself moves inside the upper receiver. |

|
Be careful removing the bolt assembly. It is very
easy to have the recoil spring launch itself across the room. It is also
a simple matter to lose the ejector, or the recoil buffer. |
|
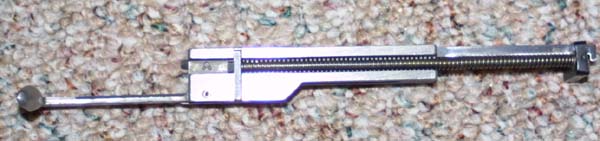
A side view of the bolt showing how the charging
handle is a part of the bolt. Also visible is the way that the recoil spring
fits in a grove on the side of the bolt. |
|
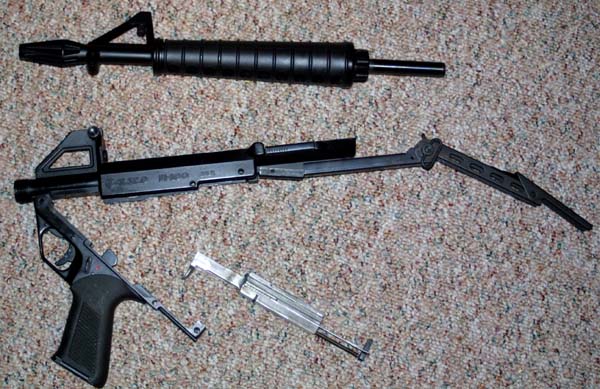
The Calico rimfire, completely disassembled for
cleaning. The barrel is removed by simply pushing the barrel shroud towards
the muzzle, and unscrewing the knurled knob where the barrel joins the receiver. |
|
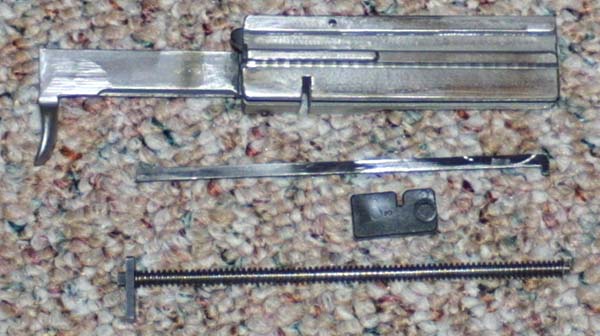
A close up of the parts of the bolt assembly.
Uppermost is the bolt itself, just below is the ejector, next is the recoil
buffer, and at the bottom is the recoil spring assembly. |
|
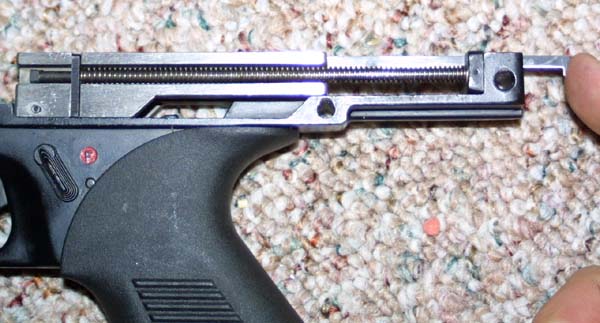
When reassembling, position the bolt assembly
on the lower receiver. Install the recoil buffer at the rear of the lower
receiver, and position the recoil spring in the small hole provided in the
recoil buffer. Lastly, place the ejector as shown in its grove on top of
the bolt, and run it through the recoil buffer and the rear of the receiver. |
|
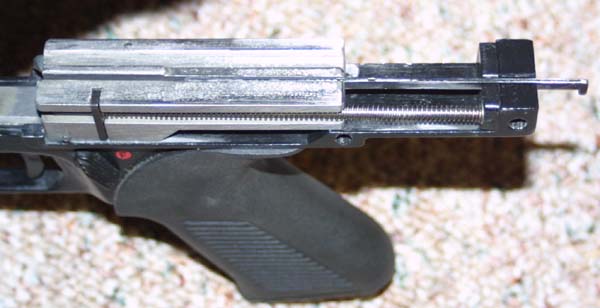
Correct positioning of the ejector is attained
by pushing it until it is flush with the back of the receiver. Note the bolt
position, and the slight compression of the recoil spring within the bolt. |

|
Correct positioning of the recoil spring, and
buffer. Note also the way the ejector is run up the bolt and through the
recoil buffer and receiver. |
|
Once all parts are positioned correctly, lock
the upper and lower units together. You will probably have to retract the
bolt slightly to allow the revceiver halves to close. |

|
Rear view of all parts correctly positioned and
ready for final assembly. Closing up the two halves of the receiver, and replacing the roll pins finishes the job. |