|
 Marlin
Camp Gun Marlin
Camp Gun
|
Length
Overall
|
Barrel
Length
|
Weight
|
Caliber
|
Action
Type
|
Magazine
Capacity
|
|
35"
|
16"
|
6
Pounds 7oz.
|
9mm
|
Recoil
Semi
|
15+1
|
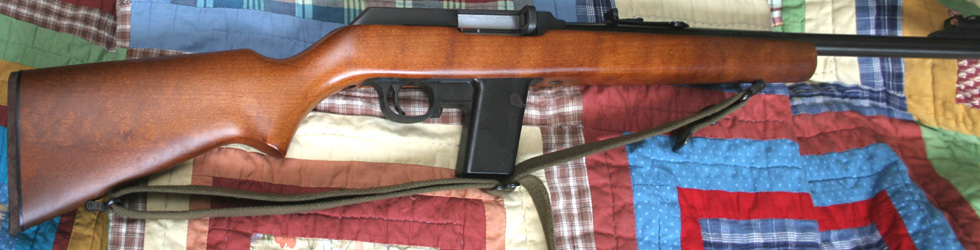
 This is the 9mm version of the handy,
Marlin Camp Gun. This is the original version, predating the .45, and is a
suitable companion to my 9mm pistols, and a nice compliment to my Marlin Camp Gun in .45 caliber.
As with it's bigger brother, Marlin did not try to
reinvent the wheel, but chose to use a standard magazine to feed the little
carbine. In this case, it is the magazine used to feed the long line of
S&W "wonder nine" handguns. This is the 9mm version of the handy,
Marlin Camp Gun. This is the original version, predating the .45, and is a
suitable companion to my 9mm pistols, and a nice compliment to my Marlin Camp Gun in .45 caliber.
As with it's bigger brother, Marlin did not try to
reinvent the wheel, but chose to use a standard magazine to feed the little
carbine. In this case, it is the magazine used to feed the long line of
S&W "wonder nine" handguns.
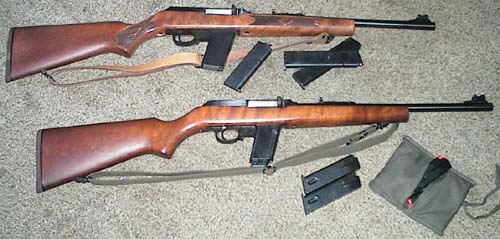
The S&W 59 series pistols have been produced in
one form or another since the introduction of the venerable Model 59, back in
1973. The series is still being produced today, in a number of different
models, from full sized duty guns down to back up, and hide out models. The
full sized guns used a 15 round magazine, while the more compact models had a
smaller, 12 round version.
This gun was produced during the clinton magazine
ban, and thus saddled with the government mandated (or was that emasculated?)
10 round magazine. The magazine housing of the Camp Gun is sized to fit what
was initially a 12 round magazine. This means that pretty much any of the
magazines produced over the last three decades, for any sized 59 series
pistol should fit. I have several old 15 rounders from the
original Model 59, and they fit and function well. As can be seen from
the photo, the 15 round mag sticks out of the bottom of the magazine housing
a tiny bit. These magazines are over twenty years old, and used to belong to
an old Model 59, which was one of the first guns I ever bought. Several years
after the gun was sold, I came across these magazines, which I must have
misplaced. I also have a pair of extended magazines which hold thirty rounds
each. These magazines, added to the trio furnished with the gun, give me
quite a bit of capacity, if I should ever decide I need it.  compared to the common .22. The guns themselves sold for
about double the cost of a good quality .22. The ammunition goes for around
eight to ten times the cost of the venerable .22 rimfire rounds. Going up the
scale, a post ban version of a civilian semi assault rifle will sell for
about four times the price of the Marlin (the preban versions being all but
unobtainable), but the ammunition will cost about the same, or even a bit
less. Thought of by plinkers as too much gun, and by
sport and defensive shooters as not enough gun, the Marlin was ignored by
both. compared to the common .22. The guns themselves sold for
about double the cost of a good quality .22. The ammunition goes for around
eight to ten times the cost of the venerable .22 rimfire rounds. Going up the
scale, a post ban version of a civilian semi assault rifle will sell for
about four times the price of the Marlin (the preban versions being all but
unobtainable), but the ammunition will cost about the same, or even a bit
less. Thought of by plinkers as too much gun, and by
sport and defensive shooters as not enough gun, the Marlin was ignored by
both.
Considering the cost, popularity, and capabilities of some
of the truly dreadful guns out there, like the civilian ingrams, tec-9's, and others of this class, it is a real shame that
the Marlins are no longer produced. The Marlin is at least the equal of all
of these guns in every way, and is superior in accuracy, and handling
qualities, while costing less. With aftermarket magazines holding as many as
twenty rounds (or even more in the case of some aftermarket 9mm S&W
magazines), the Marlin can even match or exceed the vaunted firepower of
these other guns.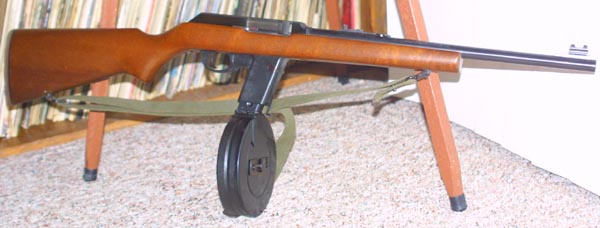
Even better, since the end of the
idiotic magazine ban, a number of hi cap magazines are available at
fairly low prices, including some 9mm drums. The drums in question are from
the old Soumi submachine guns. These are 72 round magazines, which are easily
modified to fit the Camp Gun, as well as a number of other weapons. The total
cost of conversion of the magazine is about $50, including the cost of the
magazine itself (as of 2012). Time invested comes out to about an hour and a
half. I presently have four such magazines.
The practical, utilitarian design of the Marlin has given
it a sporting look, which makes the gun much less threatening than the
military style carbines mentioned above. Though this unassuming appearance
has probably hurt the Camp Guns in the self defense marketplace, I consider
this style to be preferable to the more aggressive look of the military type
guns which have become so popular. Marlin's decision to use the most
pervasive .45, and 9mm magazines in the world means
that there will never be a problem procuring magazines, which is often not
the case after a semi auto firearm has been discontinued. I suspect that in
years to come, these guns will be sought out and valued much as the old Ruger
.44 carbine, and the old Dan Wesson's are today. All
of these are cases in which a well thought out concept was dashed against an
unready market.
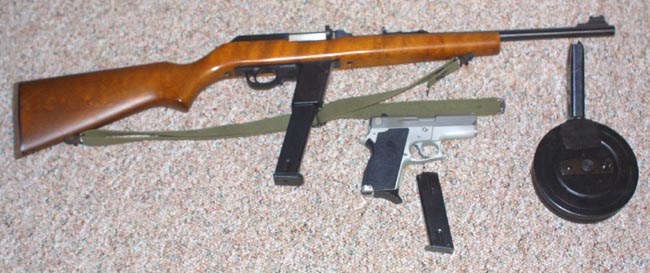
My 9mm Carbine combo. This gun, and the S&W
automatic, take the same magazines, including the 30 round extended
version in the carbine, and the 72 round modified Suomi drum to the right of
the photo. So far everything is working well; but I do wonder about the
effect of the heavy Suomi drum on the plastic parts of the Camp Carbine. Time
will tell. Used in the handgun, the drum is just silly; but then, quite a
number of pretty neat things, including much of the gun culture, are pretty
silly. The Camp Carbine here is loaded with the 30 round extended S&W
style magazine.
|
Disassembly
and cleaning
|
|

|
The
Camp Carbine will need to be thoroughly cleaned after firing. This is one
of the dirtiest shooting actions I have ever seen. It is also,
unfortunately, not one of the easier designs to disassemble. Unlike many
modern firearms, this is not based upon any sort of military action, and it
was never necessary to make the design soldier proof.
|
|
|
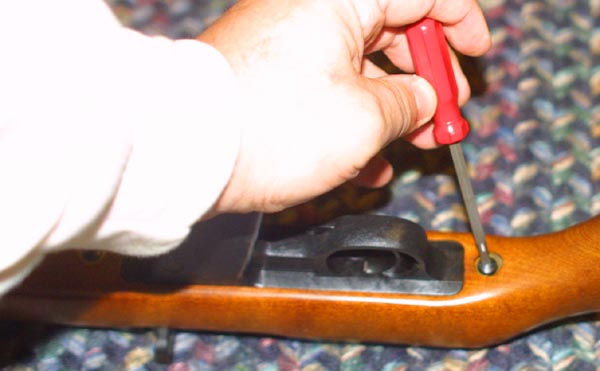
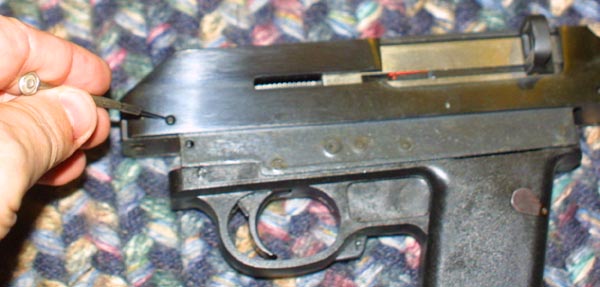
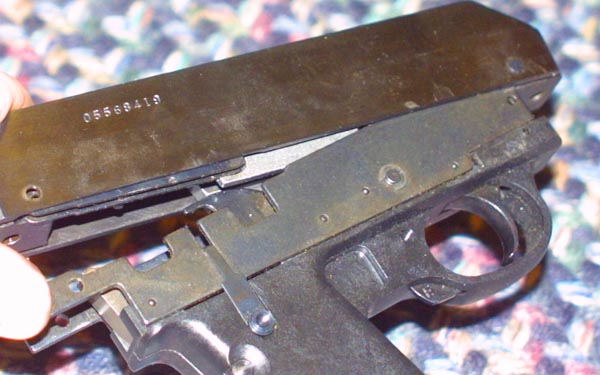
After
unscrewing both disassembly screws, the receiver will drop free of the
stock. The screws will remain in place, as they are held by retainers.
|
|
|
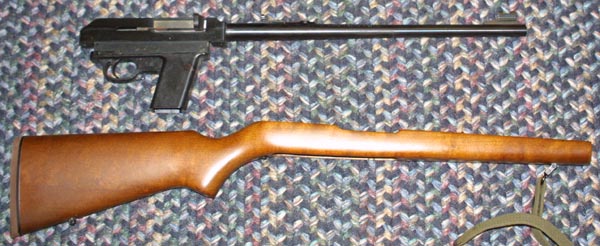
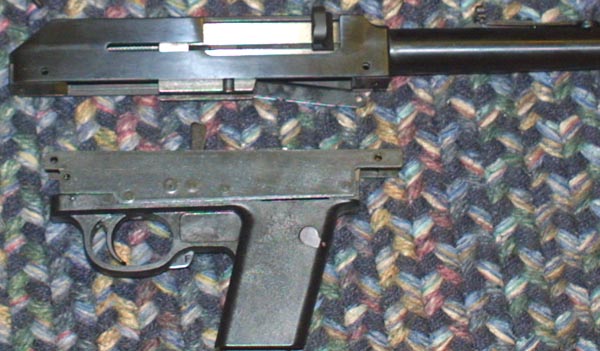
The
receiver here is shown after being removed from the stock.
|
|
|
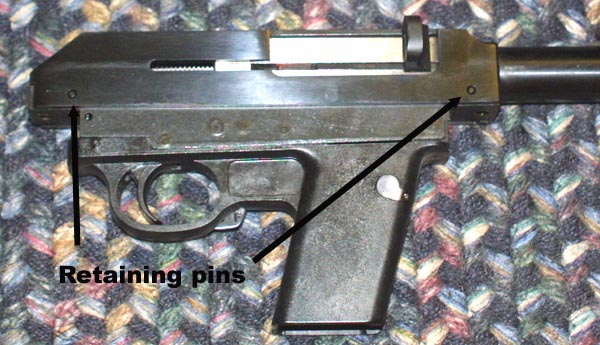
Before
cleaning the action, it will be necessary to separate the upper and lower
portions of the receiver. These are held in place by a pair of retaining
pins. Driving these pins out, will permit the action to be opened.
|
|
|
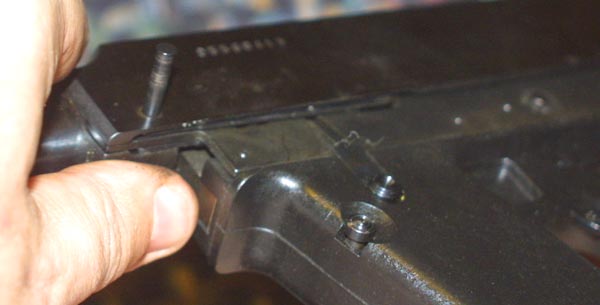
The
pins may be gently driven out, using a small punch, or narrow screwdriver.
In a well cared for gun, with no rust, the pins should slide out easily.
|
|
|
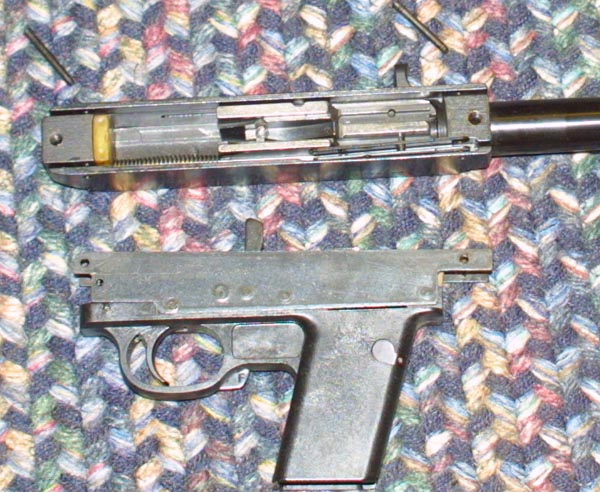
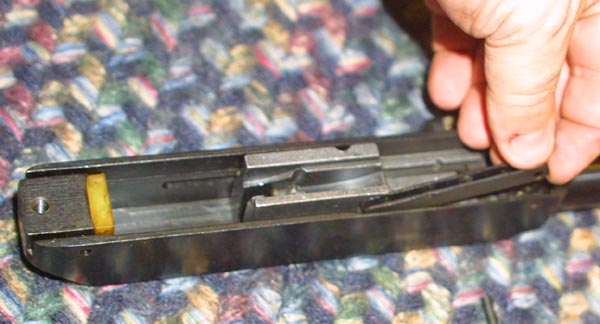
The
upper and lower receivers after separation. The upper receiver is of milled
construction, while the lower section is of molded plastic,
and stamped metal.
|
|
|
A
look at the internal workings of the upper receiver, including a view of
the bolt in place.
|
|
|
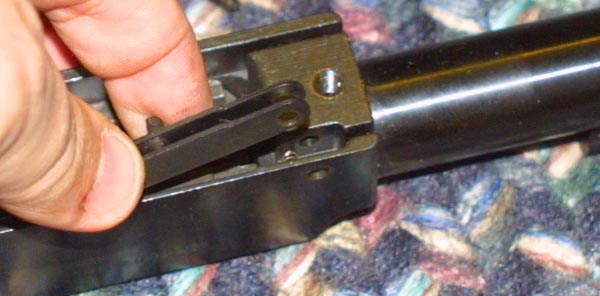
With
the upper receiver turned upside down, first remove the guide piece, which
sits on the left hand side of the receiver. It's
removal will permit the removal of the bolt. There is a captive spring
under the guide, which should stay in place on the receiver.
|
|
|
Pushing
back on the bolt a bit, will allow for it's
removal by pulling straight up. The bolt will be under a certain amount of tension
from the recoil spring. The cocking lever will remain loose in the upper
receiver, and may be removed easily.
|
|
|
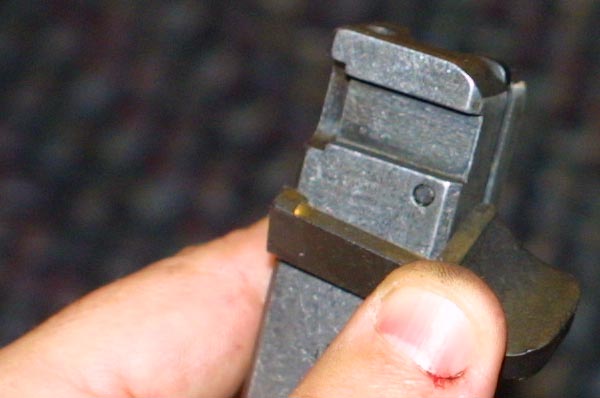
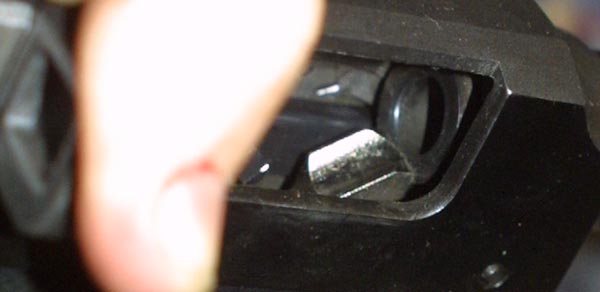
A
view of the top of the bolt, showing the notch cut for the cocking lever.
The cocking lever is shown just below, under my thumb.
|
|
|
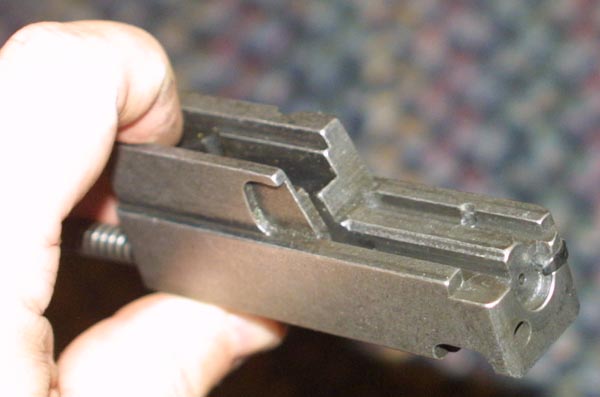
A
view of the comparatively massive bolt. the size
and weight of the bold is necessary because of the straight unlocked action
of the carbine.
|
|
|
With
the action cleaned, the bolt may be reinserted into the upper receiver. The
cocking lever will need to be inserted first, and the two pieces lined up,
so that the lever fits within it's recess in the
bolt.
|
|
|
The
guide is then replaced. It will need to be fit under the upper portion of
the bolt, and then rocked down over it's captive
spring on the receiver. The forward retaining pin, which holds the receiver
halves together, will need to fit through a hole in the guide, making it's proper adjustment in the frame critical.
|
|
|
I
generally replace the rear retaining pin first. This allows me to rock the
upper and lower receivers for the best fit, and to adjust the feed ramp,
and the guide.
|
|
|
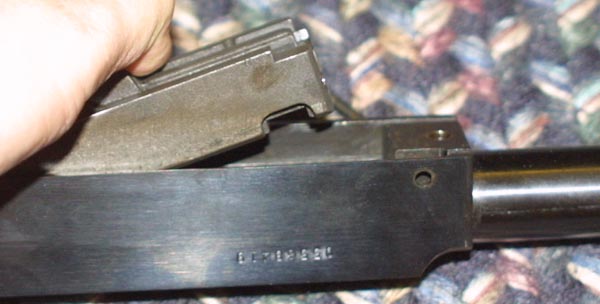
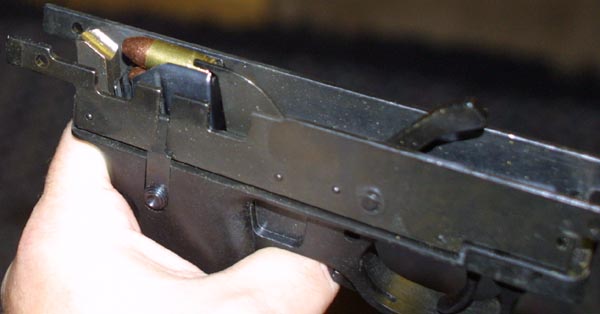
A
view of the lower receiver, with the action disassembled. A magazine is in
place, so that the relationship between the magazine, cartridges, and feed
ramp may be seen. The adjustable feed ramp here, is in it's
upper most position.
|
|
|
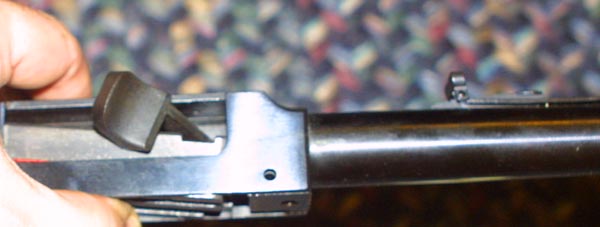
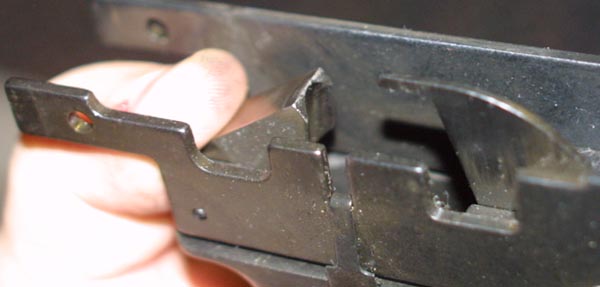
Another
look at the feed ramp, this time shown depressed, giving an idea of it's range of motion. The ramp must be properly
oriented, during reassembly, or there will be constant feeding errors. The
ramp is designed to sit just in front of the chamber of the carbine. The
spring loading which keeps it pressed up against the rear of the chamber,
also makes proper reassembly of the gun a bit tricky. The ramp will tend to
press itself under the barrel, during reassembly, which will not permit the
receiver sections to be lined up properly for insertion of the retaining
pins. It must be guided during reassembly.
|
|
|
When
joining the front portion of the two receiver sections, if the retaining
pin holes do not line up correctly, do not force the sections. Instead,
gently depress the feed ramp, as shown in the photo, until the receiver
sections line up properly. It may also be necessary to adjust the position
of the guide installed on the left hand side of the upper receiver, since
the guide also has holes through which the front retaining pin must pass.
|
|
|
A
view though the ejection port of the fully assembled Camp Carbine, showing
the feed ramp properly positioned on the chamber.
|
|